Android MVI架构详解
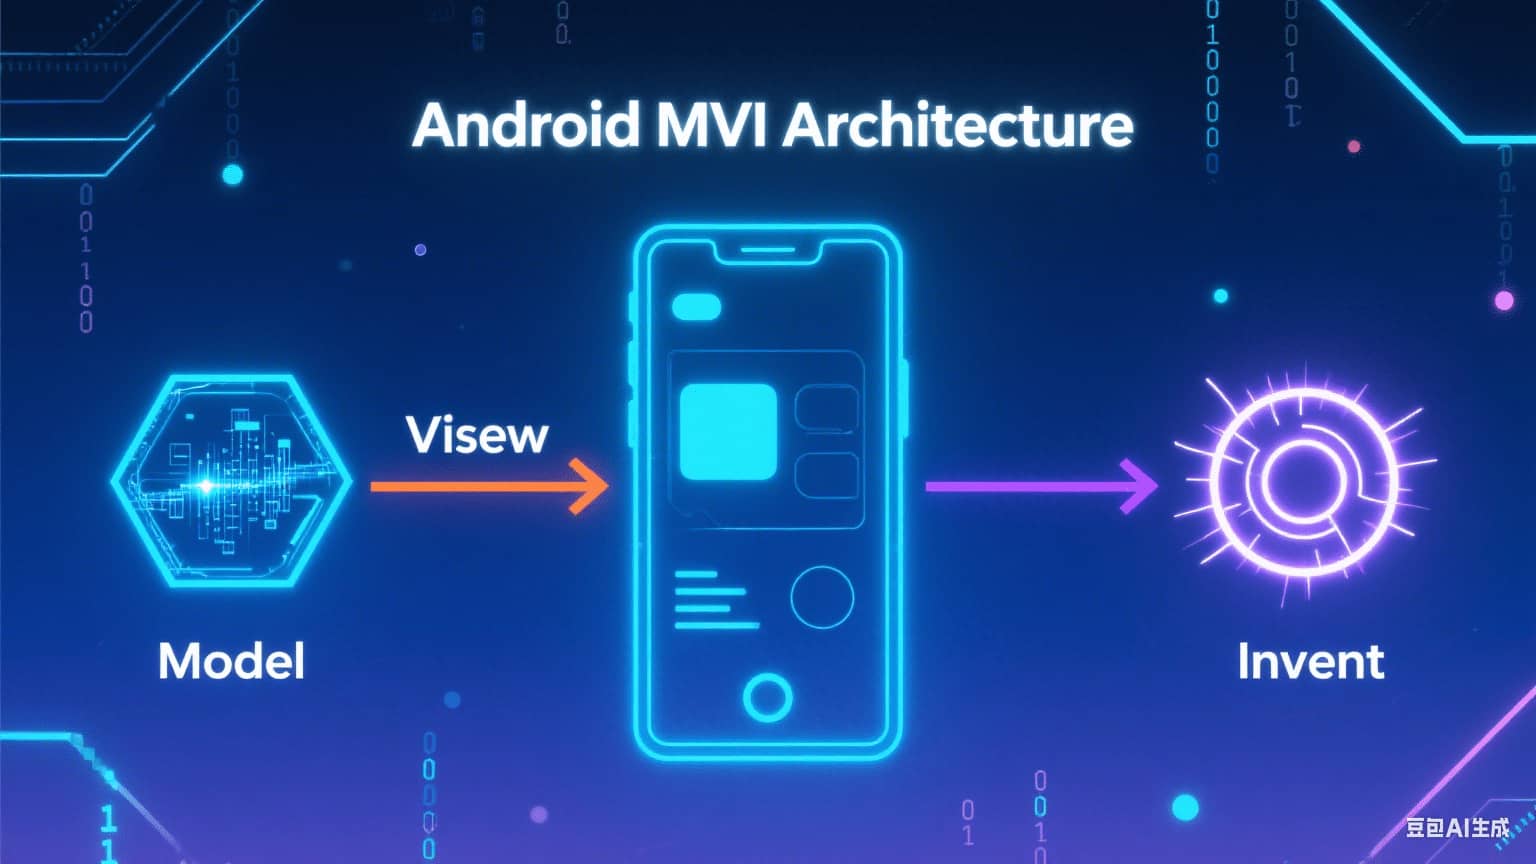
什么是 MVI 架构?
MVI 是 Model-View-Intent 的缩写,它是一种现代的、响应式的应用架构模式。其灵感来源于前端框架(如 React 中的 Redux),核心思想是单向数据流 (Unidirectional Data Flow) 和唯一数据源 (Single Source of Truth)。
与 MVVM 或 MVP 不同,MVI 旨在使应用的状态管理更加可预测、可维护和可测试。
MVI 的核心组件
MVI 将应用的逻辑分为三个主要部分:
- Model (模型)
- 这不代表传统意义上的数据层(如 Repository)。在 MVI 中,Model 特指 UI 的状态 (UI State)。
- 它是一个不可变 (Immutable) 的数据对象,包含了渲染当前界面所需的所有信息。例如:加载状态、数据列表、错误信息等。
- 每当状态需要改变时,不是去修改现有对象,而是创建一个包含新状态的全新对象。
- View (视图)
- 负责渲染 Model 所描述的 UI 状态,并捕获用户的交互操作。在现代 Android 开发中,这通常是 Activity、Fragment 或 Jetpack Compose 的 Composable 函数。
- View 的职责非常“被动”,它只做两件事:显示状态和发送用户的操作意图。它本身不包含任何业务逻辑。
- Intent (意图)
- 注意: 这里的“Intent”与 Android 系统中用于启动组件的
android.content.Intent完全不同。 - 它代表了用户的一个操作意图或业务请求。例如,“点击刷新按钮”、“加载下一页数据”、“在输入框输入了文字”等,都可以被建模为一个 Intent。它是一个描述用户“想要做什么”的对象。
- 注意: 这里的“Intent”与 Android 系统中用于启动组件的
MVI 的数据流转:一个封闭的循环
MVI 的数据流遵循一个严格且可预测的循环,这也是它的精髓所在:
graph LR
  V[View] -- "① 用户操作包装成 Intent" --> VM[ViewModel]
  VM -- "② 执行业务逻辑" --> M[Model 数据层]
  M -- "③ 返回结果" --> VM
  VM -- "④ reduce:旧 State + 结果 → 新 State" --> S[(单一不可变 State)]
  S -. "⑤ StateFlow 通知" .-> V
- 用户操作 -> Intent:用户在 View 上进行操作(如点击按钮)。
- Intent -> ViewModel:View 将这个操作包装成一个 Intent 对象,并发送给处理逻辑的地方(通常是 ViewModel)。
- ViewModel 处理 Intent:ViewModel 接收到 Intent,根据其类型执行相应的业务逻辑(如发起网络请求、读写数据库等)。
- 业务逻辑 -> 新的 Model:业务逻辑执行完毕后,ViewModel 会基于当前状态和业务结果,创建一个全新的 Model (State) 对象来反映 UI 的变化。
- 新 Model -> View:ViewModel 将这个新的 Model 发送出去(通常通过
StateFlow)。 - View 渲染新 Model:View 一直在监听 Model 的变化。一旦接收到新的 Model,它就会用新数据完全重新渲染自己的界面。
这个过程形成了一个封闭的、单向的循环,使得任何状态的变化都有迹可循,极大地简化了调试过程。
MVI 的优势
- 可预测性:由于数据流是单向的,状态的每一次变更都源于一个明确的 Intent,这使得追踪和复现 Bug 变得非常容易。
- 唯一数据源:UI 的所有状态都集中在一个不可变的 State 对象中,避免了多个数据源导致的状态不一致问题。
- 高度可测试性:ViewModel 的逻辑变得非常纯粹:输入一个旧 State 和一个 Intent,输出一个新 State。这种纯函数式的逻辑非常容易进行单元测试。
- 线程安全:由于 State 对象是不可变的,你可以在任何线程中创建新的 State,而不用担心多线程并发修改导致的问题。
- 与声明式 UI 完美契合:MVI 的思想与 Jetpack Compose 等声明式 UI 框架天生一对。UI 就是状态的映射函数 (
UI = f(State)),这与 MVI 的理念完全一致。
接下来,我将提供一个具体的代码示例来演示这个流程。
1
2
3
4
5
6
7
8
9
10
11
12
13
14
15
16
17
18
19
20
21
22
23
24
25
26
27
28
29
30
31
32
33
34
35
36
37
38
39
40
41
42
43
44
45
46
47
48
49
50
51
52
53
54
55
56
57
58
59
60
61
62
63
64
65
66
67
68
69
70
71
72
73
74
75
76
77
78
79
80
81
82
83
84
85
86
87
88
89
90
91
92
93
94
95
96
97
98
99
100
101
102
103
104
105
106
107
108
109
110
111
112
113
114
115
116
117
118
119
120
121
122
123
124
125
126
127
128
129
130
131
132
133
134
135
136
137
138
139
140
141
142
143
144
145
146
147
148
149
150
151
152
153
154
155
156
157
158
159
160
161
162
163
164
165
166
167
168
169
170
171
172
173
174
175
176
177
178
179
180
181
182
183
184
185
186
187
188
189
190
191
192
193
194
195
196
197
198
199
200
201
202
203
204
205
206
207
208
209
210
211
212
213
214
215
import android.os.Bundle
import androidx.activity.ComponentActivity
import androidx.activity.compose.setContent
import androidx.activity.viewModels
import androidx.compose.foundation.layout.*
import androidx.compose.material3.*
import androidx.compose.runtime.Composable
import androidx.compose.ui.Alignment
import androidx.compose.ui.Modifier
import androidx.compose.ui.text.style.TextAlign
import androidx.compose.ui.tooling.preview.Preview
import androidx.compose.ui.unit.dp
import androidx.lifecycle.ViewModel
import androidx.lifecycle.viewModelScope
import androidx.lifecycle.compose.collectAsStateWithLifecycle
import kotlinx.coroutines.delay
import kotlinx.coroutines.flow.MutableStateFlow
import kotlinx.coroutines.flow.asStateFlow
import kotlinx.coroutines.flow.update
import kotlinx.coroutines.launch
import kotlin.random.Random

// 1. 定义 Contract: State 和 Intent
// =================================================================

/**
 * 定义 UI 状态 (Model)
 * @param isLoading 是否正在加载
 * @param quote 当前显示的引言
 * @param error 错误信息,如果没有错误则为 null
 */
data class MainUiState(
    val isLoading: Boolean = false,
    val quote: String = "点击按钮获取一句名言",
    val error: String? = null
)

/**
 * 定义用户意图 (Intent)
 * 使用 sealed interface/class 可以限制意图的类型
 */
sealed interface MainIntent {
    object FetchQuote : MainIntent
}


// 2. 创建 ViewModel
// =================================================================

class MainViewModel : ViewModel() {

    // _state 是可变的,且是私有的,只能在 ViewModel 内部修改
    private val _state = MutableStateFlow(MainUiState())
    // state 是暴露给外部的、不可变的 StateFlow,用于 UI 观察
    val state = _state.asStateFlow()

    /**
     * ViewModel 的核心职责:接收 Intent,并将其转化为 State 的变更
     */
    fun handleIntent(intent: MainIntent) {
        when (intent) {
            is MainIntent.FetchQuote -> {
                fetchQuote()
            }
        }
    }

    private fun fetchQuote() {
        viewModelScope.launch {
            // 步骤 1: 发出“加载中”的状态(update {} 是原子的读-改-写,并发安全)
            _state.update { it.copy(isLoading = true, error = null) }

            try {
                // 步骤 2: 模拟网络请求
                delay(1500) // 模拟 1.5 秒的网络延迟

                // 模拟成功或失败
                if (Random.nextBoolean()) {
                    val newQuote = mockQuotes.random()
                    // 步骤 3 (成功): 发出包含新数据的状态
                    _state.update { it.copy(isLoading = false, quote = newQuote) }
                } else {
                    // 步骤 3 (失败): 抛出异常
                    throw RuntimeException("网络连接失败!")
                }

            } catch (e: Exception) {
                // 步骤 4 (捕获异常): 发出包含错误信息的状态
                _state.update { it.copy(isLoading = false, error = e.message) }
            }
        }
    }

    // 模拟一些数据
    private val mockQuotes = listOf(
        "生活就像一盒巧克力,你永远不知道下一颗是什么味道。",
        "Stay hungry, stay foolish.",
        "代码就是最好的文档。",
        "你唯一需要回头的时候,是为了看自己走了多远。"
    )
}


// 3. 创建 View (Activity + Jetpack Compose)
// =================================================================

class MainActivity : ComponentActivity() {

    private val viewModel: MainViewModel by viewModels()

    override fun onCreate(savedInstanceState: Bundle?) {
        super.onCreate(savedInstanceState)
        setContent {
            MviExampleTheme {
                // 将 ViewModel 的 state 和 intent 处理函数传入 Composable
                // collectAsStateWithLifecycle:生命周期感知,页面退后台自动停止收集
                MainScreen(
                    state = viewModel.state.collectAsStateWithLifecycle().value,
                    onIntent = { intent -> viewModel.handleIntent(intent) }
                )
            }
        }
    }
}

@Composable
fun MainScreen(state: MainUiState, onIntent: (MainIntent) -> Unit) {
    Surface(
        modifier = Modifier.fillMaxSize(),
        color = MaterialTheme.colorScheme.background
    ) {
        Column(
            modifier = Modifier
                .fillMaxSize()
                .padding(24.dp),
            horizontalAlignment = Alignment.CenterHorizontally,
            verticalArrangement = Arrangement.Center
        ) {
            // 根据 state.quote 显示文本
            Text(
                text = state.quote,
                style = MaterialTheme.typography.headlineSmall,
                textAlign = TextAlign.Center
            )

            Spacer(modifier = Modifier.height(40.dp))

            // 根据 state.isLoading 决定显示加载圈还是按钮
            if (state.isLoading) {
                CircularProgressIndicator()
            } else {
                Button(
                    onClick = { onIntent(MainIntent.FetchQuote) },
                    // 加载中时禁用按钮
                    enabled = !state.isLoading
                ) {
                    Text(text = "获取下一句")
                }
            }

            // 如果 state.error 不为 null,则显示错误信息
            state.error?.let {
                Spacer(modifier = Modifier.height(24.dp))
                Text(
                    text = it,
                    color = MaterialTheme.colorScheme.error,
                    style = MaterialTheme.typography.bodyMedium
                )
            }
        }
    }
}

// 主题和预览
@Composable
fun MviExampleTheme(content: @Composable () -> Unit) {
    MaterialTheme(
        colorScheme = darkColorScheme(), // 使用深色主题
        content = content
    )
}

@Preview(showBackground = true)
@Composable
fun DefaultPreview() {
    MviExampleTheme {
        MainScreen(
            state = MainUiState(quote = "这是一个预览"),
            onIntent = {}
        )
    }
}

@Preview(showBackground = true)
@Composable
fun LoadingPreview() {
    MviExampleTheme {
        MainScreen(
            state = MainUiState(isLoading = true),
            onIntent = {}
        )
    }
}

@Preview(showBackground = true)
@Composable
fun ErrorPreview() {
    MviExampleTheme {
        MainScreen(
            state = MainUiState(error = "加载失败了!"),
            onIntent = {}
        )
    }
}
MVI 与 MVVM 的对比
MVI 经常被拿来与 MVVM (Model-View-ViewModel) 进行比较。它们的主要区别在于:
| 特性 | MVVM | MVI |
|---|---|---|
| 数据流 | 通常是双向的(通过数据绑定),但也可以实现 单向。 | 严格的单向数据流。 |
| 状态管理 | ViewModel 可能会暴露多个可变的 LiveData 或 StateFlow 来代表不同的 UI 状态。 | ViewModel 只暴露一个唯一的、不可变的State 对象(通常通过 StateFlow)。 |
| 用户操作 | View 直接调用 ViewModel 的方法。 | View 发送 Intent (意图) 给 ViewModel。 |
本质上,MVI 可以理解为 MVVM + 单一不可变状态 + 单一变更入口的强约束版本。关于 MVP、MVVM、MVI 三代架构的演进逻辑与逐维度对比(含同一页面的三种实现),可以看姊妹篇:Android 架构演进:MVP、MVVM、MVI 的区别详解。
进阶实践:Intent 统一入口、Effect 一次性事件与状态建模
上面的示例把 Intent 处理写成了普通方法调用(viewModel.handleIntent(intent)),对多数页面已经够用。但在更严格的 MVI 实践中还有三个常见的进阶点:Intent 需要统一入口串行处理、一次性事件(Toast/导航)不能混进 State、互斥状态要在类型层面建模。下面把一个”获取一言”的示例升级成完整版。
1. 定义契约:State、Intent 与 Effect
1
2
3
4
5
6
7
8
9
10
11
12
13
14
15
16
17
18
// MainContract.kt

// UI 状态:持续性,可随时重放最新值,界面重建靠它恢复
data class MainState(
    val isLoading: Boolean = false,
    val hitokoto: String = "点击按钮获取一言",
    val error: String? = null
)

// 用户意图:View 能发起的所有操作的穷举
sealed interface MainIntent {
    object FetchHitokoto : MainIntent
}

// 一次性副作用:只消费一次,重放就是 bug(如旋转屏幕后重复弹 Toast)
sealed interface MainEffect {
    data class ShowToast(val message: String) : MainEffect
}
State 与 Effect 的分离是 MVI 实践中最容易被忽略的一环:State 是”界面现在长什么样”,Effect 是”此刻发生了一件事”。把 Toast 消息塞进 State 会遇到经典难题——弹完之后要不要把字段清空?什么时候清?Effect 通道从根上消除了这个问题。
2. ViewModel:用 Channel 收 Intent、发 Effect
1
2
3
4
5
6
7
8
9
10
11
12
13
14
15
16
17
18
19
20
21
22
23
24
25
26
27
28
29
30
31
32
33
34
35
36
37
38
39
40
41
42
43
44
45
46
47
48
49
50
51
52
53
54
55
// MainViewModel.kt

import androidx.lifecycle.ViewModel
import androidx.lifecycle.viewModelScope
import kotlinx.coroutines.channels.Channel
import kotlinx.coroutines.delay
import kotlinx.coroutines.flow.MutableStateFlow
import kotlinx.coroutines.flow.asStateFlow
import kotlinx.coroutines.flow.receiveAsFlow
import kotlinx.coroutines.flow.update
import kotlinx.coroutines.launch

class MainViewModel : ViewModel() {

    // Intent 统一入口:UNLIMITED 让 trySend 永不失败,View 侧无需开协程
    private val intents = Channel<MainIntent>(Channel.UNLIMITED)

    private val _state = MutableStateFlow(MainState())
    val state = _state.asStateFlow()

    // Effect 通道:页面在后台时事件不丢,回前台补发;消费即删除,不粘
    private val _effect = Channel<MainEffect>(Channel.BUFFERED)
    val effect = _effect.receiveAsFlow()

    init {
        // 单一协程顺序消费所有 Intent:意图按到达顺序串行处理,reduce 无并发竞争
        viewModelScope.launch {
            for (intent in intents) {
                when (intent) {
                    is MainIntent.FetchHitokoto -> fetchHitokoto()
                }
            }
        }
    }

    // View 调用的唯一方法:非挂起,随处可调
    fun sendIntent(intent: MainIntent) {
        intents.trySend(intent)
    }

    private suspend fun fetchHitokoto() {
        // update {} 是原子的"读-改-写",多协程并发更新也不会丢失变更
        _state.update { it.copy(isLoading = true, error = null) }

        runCatching {
            delay(1500)                       // 实际项目中这里调用 Repository
            "人生得意须尽欢,莫使金樽空对月。"
        }.onSuccess { hitokoto ->
            _state.update { it.copy(isLoading = false, hitokoto = hitokoto) }
        }.onFailure { e ->
            _state.update { it.copy(isLoading = false, error = e.message) }
            _effect.send(MainEffect.ShowToast("加载失败,请重试")) // 一次性提示走 Effect
        }
    }
}
两个 Channel 的选型都有讲究:
- Intent 用
UNLIMITED:意图不能丢、也不能让 View 挂起等待,无限缓冲让trySend一定成功; - Effect 用
BUFFERED+receiveAsFlow()而不是 SharedFlow:replay = 0的 SharedFlow 在页面处于后台(收集被repeatOnLifecycle停掉)时发出的事件会直接丢失,replay = 1又会粘性重放;Channel 会把事件留在缓冲里等 UI 回前台补发,且一个事件只被消费一次。
3. View:分别收集 State 与 Effect
1
2
3
4
5
6
7
8
9
10
11
12
13
14
15
16
17
18
19
@Composable
fun MainRoute(viewModel: MainViewModel = viewModel()) {
    // 生命周期感知的收集:页面退后台自动停止
    // (collectAsState 不感知生命周期;需依赖 androidx.lifecycle:lifecycle-runtime-compose)
    val state by viewModel.state.collectAsStateWithLifecycle()
    val context = LocalContext.current

    // Effect 只消费一次,放在 LaunchedEffect 中收集
    LaunchedEffect(Unit) {
        viewModel.effect.collect { effect ->
            when (effect) {
                is MainEffect.ShowToast ->
                    Toast.makeText(context, effect.message, Toast.LENGTH_SHORT).show()
            }
        }
    }

    MainScreen(state = state, onIntent = viewModel::sendIntent)
}
MainScreen 与第一个示例完全一致,无需任何改动——这正是 MVI 的好处:无论 ViewModel 内部如何升级,View 永远只是 f(State) 的纯函数映射。
4. 更进一步:用 sealed class 消灭非法状态
data class 里 isLoading、hitokoto、error 三个字段可以组合出”加载中同时显示错误”这类现实中不该存在的状态。对互斥的界面形态,可以用 sealed 类型让非法状态在类型层面就无法表示:
1
2
3
4
5
sealed interface MainUiState {
    object Loading : MainUiState
    data class Success(val hitokoto: String) : MainUiState
    data class Error(val message: String) : MainUiState
}
经验法则:字段彼此独立时用 data class,界面形态互斥时用 sealed class,复杂页面可以混合使用(data class 中嵌套 sealed 的局部状态)。
总结
MVI 架构通过其严格的单向数据流和集中的状态管理,为构建复杂且高质量的 Android 应用提供了一个强大的范式。虽然在初次接触时,可能会觉得相比 MVVM 需要编写更多的模板代码(如定义 State 和 Intent),但这种投入在项目的长期维护性和可测试性上会带来巨大的回报。尤其是在使用 Jetpack Compose 这种声明式 UI 框架时,MVI 的思想能够与之完美契合,让 UI 的更新逻辑变得更加清晰和自然。希望通过本文的讲解和示例,您能对 MVI 架构有一个更深入的理解,并能在您的下一个项目中尝试使用它。